
HDMI cable is generally used for sharing videos and audio from one device to another, offering the best picture quality. It acts as a bidirectional unit that discusses with the display device to achieve the best resolution feature and audio quality. As it offers high definition quality it has been used by most of us for sharing screens. Now, if you are looking for the steps that can help you share your windows on the bigger screen or in other words if you want to enable your HDMI port turn-on in your windows then follow the complete tutorial.
The article will explain to you to turn on the HDMI port on Windows 7 and Windows 10 with a complete procedure. Let us discover more about them.
How To Access HDMI on PC
Before you move forward you must keep a note of some of the following notes. So first have a look over them.
The market has a variety of HDMI cables that will support all the features like video and audio quality but if you want the UHD quality along with the Ethernet then you have to buy the particular HDMI cable for your system. So select the HDMI cable wisely.
Steps To Follow | Turn-On the HDMI Port on Windows
Enabling the HDMI port on your windows is a simple task. You just have to follow some of the following steps to make it work. So let us understand what are those steps?
Connect Windows 10 with TV
Connecting your Windows 10 HDMI port with your TV or projector can be done with the following steps. Follow them to connect it.
Step 1: Select the HDMI port
It is very necessary to understand the type of HDMI port. Because of the type of HDMI cable the quality will persist. Although, HDMI always supports the best picture quality, however, with the more advanced HDMI cable the quality has also been enhanced. Therefore select the HDMI cable first.
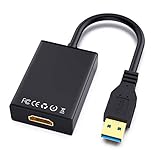
- Usb 3. 0 to HDMI Adapter: This USB HDMI adapter can connect...
- 1080P supported for USB 3. 0 & USB 2. 0: 24K gold plated USB...
- Easy to install: this USB3. 0 to HDMI Adapter with internal...
- Widely applied: the HDMI to USB adapter not only could...
Last update on 2023-02-20 at 00:31 / Affiliate links / Images from Amazon Product Advertising API
Step 2: Turn on the display
Turn ON your TV or display device and select the HDMI port. If you have multiple HDMI ports then select the one which is activated.
Step 3: Now Hold Win+ P to open the Windows Project.
Step 4: A dialogue box will appear. Select the option according to your choice such as screen saver only, PC, or extends.
Step 5: Wait for a few seconds and the screen will cast itself automatically.
Connecting Windows 7 with TV
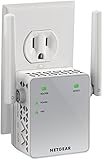
- EXTENDED WIRELESS COVERAGE: Adds Wi-Fi range coverage up to...
- AC750 WI-FI SPEED: Provides up to 750Mbps performance using...
- UNIVERSAL COMPATIBILITY: Works with any wireless router,...
- WIRED ETHERNET PORT: Simply plug in game consoles, streaming...
Last update on 2023-02-18 at 17:12 / Affiliate links / Images from Amazon Product Advertising API
You can share your Windows media with the TV easily. Just make sure that you have the right cable. Now let us check the steps to work on them.
Step 1: Make sure that you have the cable.
Understand the type of cable that you will require. If done for a special purpose then try to get the UJD HDMI cable to give the best picture quality.
Step 2: Connect the cables.
Bring the computer and the display device together. And then connect them. Connect one end of the cable with the computer.
Step 3: Turn on the device
Before you proceed, first switch on your computer and the TV. Then go to your TV settings Customize the windows screen to fit with the TV screen.
Step 4: Now go to the Control Panel and select on Display.
Step 5: From the left side select the Display Settings.
Step 6: Now select the Multiple Monitor from the display drop menu.
Step 7: Select the resolution.
Step 8: Select the available Display output.
Step 9: At the bottom right corner select the INTEL(R) Graphics icon and go to graphics property.
Step 10: Select the display and adjust the resolution accordingly. And there you go.
Conclusion
The two methods shown above can be used to share your Windows screen with the television. Although the process for both of them is quite the same. So, connect your windows with a bigger screen to enjoy the entertainment or presentation. Establishing the connection via HDMI cable will help you set a safer connection as compared with the other online means. Therefore, connecting the two devices with an HDMI cable is the best of all solutions.